
Imagine a world where snuggles come to life, where softness and charm converge to create companions that warm your heart. Crafting handmade plush toys allows you to enter this whimsical realm, where creativity knows no bounds.
From choosing the perfect materials to adding those delicate embroidered details, each step is an opportunity to infuse personality into your creation. But there’s more to discover beyond the stitches and fluff.
So, why not dive into the enchanting world of crafting handmade plush toys and unravel the secrets that will bring your plushies to life?
Choosing the Right Materials
When choosing materials for your handmade plush toys, it’s essential to consider their quality and suitability for the intended purpose. You want your plush toys to be durable and safe for children to play with. To ensure this, opt for fabrics that are soft, yet sturdy enough to withstand constant handling. Look for materials that are hypoallergenic and free from any harmful substances. This way, you can rest assured that your plush toys are safe for kids with sensitive skin or allergies.
Another crucial factor to consider is the ease of cleaning. Children’s toys tend to get dirty quickly, so using materials that are machine washable or easy to spot clean will save you time and effort in the long run. Additionally, choose fabrics that don’t easily fade or lose their shape after washing, ensuring that your plush toys maintain their appeal for a longer time.
Furthermore, think about the aesthetic appeal of the materials. Choose fabrics with vibrant colors and patterns that will capture the attention of children. Additionally, consider adding different textures to your plush toys, such as fur, felt, or ribbons, to provide tactile stimulation and enhance the sensory experience.
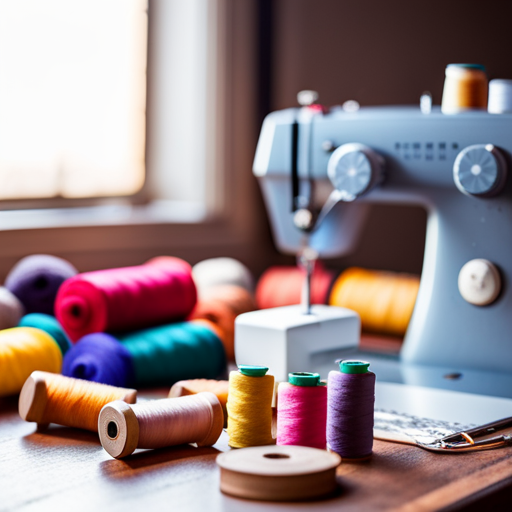
Essential Tools for Plush Toy Making
To create handmade plush toys, you’ll need a variety of essential tools. These tools are crucial in ensuring that your plush toys are well-made and have a professional finish.
The first tool you’ll need is a pair of sharp scissors. You’ll use these scissors to cut out the fabric for your plush toys, so it’s important to have a pair that can easily cut through different types of fabrics.
Additionally, you’ll need a sewing machine or a needle and thread. A sewing machine will make the process faster and more efficient, but if you prefer hand sewing, a needle and thread will suffice.
Another essential tool is stuffing. You’ll need a soft and hypoallergenic stuffing material to give your plush toys their shape and volume.
Lastly, you’ll need safety eyes or buttons for the toy’s eyes, a fabric marker or chalk for marking patterns, and a seam ripper for any mistakes or adjustments.
With these essential tools, you’ll be well-equipped to create beautiful handmade plush toys.
Designing Your Plush Toy Pattern
Now that you have all the essential tools for plush toy making, it’s time to move on to designing your plush toy pattern.
This step is crucial because it determines the shape, size, and overall look of your finished toy.
To begin, you’ll need some basic supplies such as paper, scissors, and a pencil.
Start by sketching out your desired design on the paper. Keep in mind the dimensions and proportions of your toy, as well as any specific details or features you want to include.
Once you’re satisfied with your sketch, carefully cut it out using the scissors. This will serve as your template for cutting out the fabric.
Lay the template on your chosen fabric and trace around it with a fabric marker or chalk. Don’t forget to account for seam allowances!
After tracing, cut out the fabric pieces and pin them together to see how they fit. Make any necessary adjustments before sewing.
Sewing Techniques for Beginners
If you’re new to sewing, mastering a few basic techniques can help you create beautiful handmade plush toys.
One of the first techniques you should learn is how to thread a needle. Start by cutting a piece of thread about 18 inches long. Insert one end of the thread through the eye of the needle and pull it through until you have equal lengths on both sides.
Next, you’ll need to learn how to tie a knot at the end of your thread. Hold the end of the thread between your thumb and index finger, wrap it around the needle a couple of times, and then pull it tight. This will secure the thread in place and prevent it from unraveling while you sew.
Once you’ve mastered threading and knotting, you can move on to basic stitches. The most common stitch used in sewing plush toys is the running stitch. To do a running stitch, insert the needle through the fabric and pull it through. Then, insert the needle back into the fabric a short distance away and pull it through again. Keep repeating this process, making sure your stitches are evenly spaced, until you’ve sewn all the pieces of your plush toy together.
Another important technique to learn is how to sew on buttons or embellishments. To attach a button, thread your needle and tie a knot at the end. Insert the needle through the fabric where you want the button to be and then push it through one of the holes in the button. Bring the needle back through the fabric and the other hole in the button, and repeat this process a few times to secure the button in place.
Lastly, it’s crucial to learn how to properly finish your stitches. To finish a stitch, insert the needle through the fabric and pull it through, leaving a small loop. Pass the needle through the loop and pull it tight. This will create a knot that will keep your stitches from coming undone.
Adding Personality With Embroidery Details
Get creative and add personality to your handmade plush toys with embroidery details. Embroidery can be a fun and easy way to bring your toys to life and make them truly unique. Whether you want to add cute facial features, intricate patterns, or personalized messages, embroidery allows you to customize your toys in endless ways.
To get started, gather some embroidery floss in colors that complement your plush toy. Choose a needle with a small eye that can easily pass through the fabric without leaving large holes. Plan out your design beforehand by sketching it on paper or using fabric markers directly on the toy.
When embroidering, use small, neat stitches to ensure that the thread stays securely in place. You can experiment with different stitches like the backstitch, satin stitch, or French knot to achieve different effects. For example, the backstitch is great for outlining shapes, while the satin stitch can be used to fill in larger areas.
Remember to be patient and take your time with each stitch. The more attention to detail you put into your embroidery, the more personality your plush toy will have. So let your imagination run wild, and have fun adding those special touches that will make your handmade plush toys truly one-of-a-kind.
Stuffing and Assembling Your Plush Toy
To bring your handmade plush toy to life, you’ll need to carefully stuff and assemble it.
Start by selecting the appropriate stuffing material. Polyester fiberfill is commonly used and provides a soft and cuddly feel. Take small handfuls of stuffing and gently push them into the different parts of your toy, ensuring that you fill all the corners and curves. Use a chopstick or a pencil to help you distribute the stuffing evenly. Be careful not to overstuff, as it can affect the shape and appearance of your toy.
Next, it’s time to assemble your plush toy. Begin by sewing the different parts together. Use a strong thread and a whip stitch to securely attach the limbs, head, and body. Make sure to double-check that everything is aligned properly before sewing. If you want to add any accessories, such as buttons for eyes or a ribbon for a bow, now is the time to do so. Be creative and personalize your toy to make it unique.
Once you have finished sewing and attaching all the parts, give your plush toy a final inspection. Make any necessary adjustments to ensure that everything is secure and in place. Trim any excess thread and give your toy a gentle shake to fluff up the stuffing.
Congratulations! You have successfully stuffed and assembled your handmade plush toy. Now, it’s time to enjoy and share your creation with others.
Finishing Touches: Eyes, Noses, and Accessories
Now, let’s discuss how to add the finishing touches to your handmade plush toy, including the eyes, noses, and accessories. These small details can bring your creation to life and give it personality.
When it comes to eyes, you have a few options. You can use plastic safety eyes, which are available in various sizes and colors. Simply insert them into the fabric and secure them with the washers provided. Alternatively, you can sew on felt or embroidered eyes using a needle and thread. This gives a more handmade and unique look to your plush toy.
For the nose, you can use a variety of materials such as plastic or wooden buttons, felt, or embroidery. It depends on the look you want to achieve. If you prefer a more realistic nose, you can use a plastic or wooden button. For a softer and more whimsical look, felt or embroidery can be used to create a nose shape and sewn onto the toy.
Accessories can add an extra touch of charm to your plush toy. You can make a tiny bow tie, a miniature hat, or even a tiny scarf using fabric scraps. These accessories can be sewn onto the toy or attached with adhesive if you prefer a temporary option.
Remember to always secure the eyes, noses, and accessories tightly to ensure they don’t come loose and pose a choking hazard.
Now, with these finishing touches, your handmade plush toy is complete and ready to be loved and cherished.
Tips for Cleaning and Caring for Your Handmade Plush Toys
Proper cleaning and care are essential to maintaining the quality and longevity of your handmade plush toys. While these toys are adorable and cuddly, they can also collect dirt, dust, and stains over time. To keep them looking their best, here are a few tips for cleaning and caring for your handmade plush toys.
Firstly, it’s important to check the care instructions provided by the maker. Some plush toys may be machine washable, while others may require hand washing or spot cleaning. Following the recommended cleaning method will help prevent any damage to the toy.
If your plush toy is machine washable, place it in a pillowcase or laundry bag to protect it during the wash cycle. Use a gentle detergent, and wash on a delicate or low-speed setting. Avoid using bleach or harsh chemicals, as they can damage the fabric and colors.
For toys that need to be hand washed or spot cleaned, use a mild detergent and warm water. Gently scrub the stained area with a soft cloth or sponge, being careful not to rub too hard and damage the fabric. Rinse thoroughly and allow the toy to air dry completely before playing with it again.
Regularly inspect your plush toys for any loose threads, tears, or other signs of wear. Repair any damages promptly to prevent them from getting worse. If needed, reinforce weak spots with extra stitching or fabric patches.
In addition to cleaning, proper storage is also important. Keep your handmade plush toys in a clean and dry place, away from direct sunlight and moisture. Avoid storing them in plastic bags, as this can trap moisture and lead to mold or mildew growth.