
Imagine yourself as a tailor, standing before a beautiful piece of fabric with a vision in mind. Your hands are skilled, yet lacking in the finesse required to bring your creation to life.
Like a painter with a brush, you need to master the strokes of your needle and thread. Welcome to the world of basic sewing stitches, where the foundation of any sewing project starts.
Whether you’re a complete beginner or have dabbled in sewing before, this guide will take you step by step through the essential stitches that every budding seamstress should know.
Get ready to unlock the secrets of the running stitch, backstitch, whipstitch, and blanket stitch, as we unravel the art of sewing one stitch at a time.
Gathering the Necessary Materials
To begin, gather all the necessary materials for your sewing project. Before you embark on any sewing endeavor, it’s crucial to have the right tools and supplies at hand. This will ensure that your sewing experience is smooth and efficient.
Start by selecting the appropriate fabric for your project. Consider the weight, texture, and color that best suits your vision.
Next, gather your measuring tape, scissors, and pins. These tools will help you accurately measure and cut your fabric.
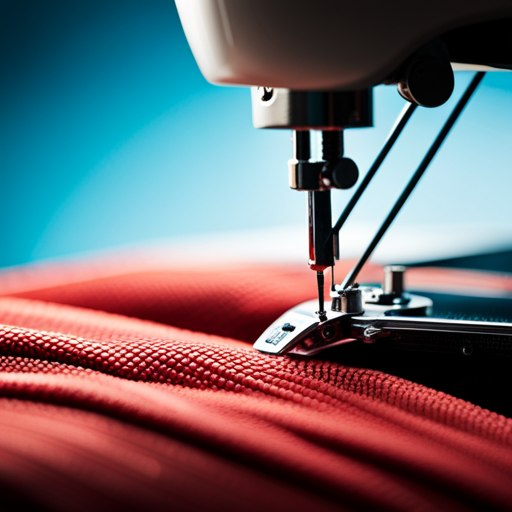
Additionally, you’ll need a sewing machine or needle and thread, depending on the complexity of your project. Don’t forget to have a variety of thread colors available, as this will allow you to match or contrast with your fabric.
Lastly, have a seam ripper and iron nearby for any necessary adjustments or pressing. By having all these materials ready, you’ll be well-prepared to start your sewing project and achieve satisfying results.
Understanding Different Types of Needles and Threads
Before you begin sewing, it’s important to have a good understanding of the different types of needles and threads that are available. Needles come in various sizes and types, each designed for specific purposes. The size of the needle is determined by the thickness of the fabric you’re working with. For lightweight fabrics like silk or chiffon, use a smaller needle size, while heavier fabrics like denim or canvas require a larger needle to penetrate the fabric properly.
There are also different types of needles for different sewing techniques. For general sewing, a sharp needle is commonly used. However, if you’re working with knits or stretch fabrics, a ballpoint needle is recommended to prevent the fabric from getting damaged. If you’re sewing leather or vinyl, a leather needle with a sharp point is ideal.
When it comes to thread, there are various options to choose from. The most common types of thread are polyester and cotton. Polyester thread is known for its strength and durability, making it suitable for most sewing projects. Cotton thread, on the other hand, is ideal for delicate fabrics like silk or lace, as it’s less likely to cause damage.
Threading the Needle and Tying a Knot
Now that you have a good understanding of the different types of needles and threads, it’s time to learn how to thread the needle and tie a knot.
Threading the needle may seem like a daunting task, but with a little practice, you’ll be able to do it effortlessly. Start by cutting the thread at an angle to create a sharp point. Hold the thread between your thumb and index finger, and gently push the thread through the eye of the needle. If you’re having trouble, you can wet the tip of the thread to stiffen it and make it easier to insert. Once the thread is through the eye, pull it until there’s an equal length of thread on both sides.
Now that your needle is threaded, it’s time to tie a knot. Take one end of the thread and wrap it around your finger twice. Then, slide the loops off your finger and hold them between your thumb and index finger. Next, take the free end of the thread and pass it through the loops, creating a knot. Pull the ends of the thread to tighten the knot, and you’re ready to start sewing.
Threading the needle and tying a knot are essential skills in sewing. With practice, you’ll be able to do them quickly and efficiently. So don’t be discouraged if it takes a few tries to get the hang of it. Keep practicing, and soon enough, you’ll be sewing like a pro.
Mastering the Basic Running Stitch
Start by practicing the basic running stitch, which is one of the most fundamental stitches in sewing. The running stitch is simple yet versatile, making it a great stitch for beginners to master.
To begin, thread your needle and tie a knot at the end of the thread. Hold the fabric firmly and push the needle through the fabric from the backside to the front, about 1/4 inch away from the starting point. Pull the thread through until the knot catches on the fabric.
Now, insert the needle back into the fabric, a short distance away from the first stitch. Continue this process, making evenly spaced stitches along the desired seamline. Remember to keep your stitches straight and consistent in length.
The running stitch is commonly used for basting, gathering fabric, and simple hand-sewn hems. Practice this stitch on scrap fabric until you feel comfortable with the technique.
With time and practice, you’ll be able to master the basic running stitch and move on to more advanced stitches.
Learning the Versatile Backstitch
After mastering the basic running stitch, it’s time to explore the versatile backstitch. The backstitch is a strong and durable stitch that’s commonly used in garment construction, repairs, and hand embroidery. It’s perfect for creating secure seams, attaching appliques, and adding intricate details to your projects.
To start the backstitch, bring your needle up through the fabric from the wrong side. Then, insert the needle back down into the fabric a short distance away. Unlike the running stitch, the backstitch involves sewing in reverse. To create the second stitch, bring the needle up through the fabric, a short distance ahead of the previous stitch. Then, insert the needle back down into the fabric at the end of the first stitch. Repeat this process, creating a continuous line of stitches.
The backstitch is known for its strength and durability because the stitches overlap each other, creating a solid line of thread. This makes it ideal for sewing seams that need extra reinforcement, such as on pants or jackets. Additionally, the backstitch allows you to sew curves and corners with ease, making it a versatile stitch for various sewing projects.
Exploring the Decorative Whipstitch
To add decorative flair to your sewing projects, consider incorporating the versatile whipstitch. This stitch isn’t only functional but also adds a beautiful finishing touch to your creations.
The whipstitch is commonly used to join two fabric edges together, but it can also be used as a decorative element. It creates a neat, visible line of stitches on the right side of the fabric, adding texture and interest to your project.
To create the decorative whipstitch, start by aligning the edges of the fabric you want to join. Thread a needle with a contrasting thread color to make the stitches stand out. Insert the needle from the back of the fabric and bring it up through both layers, about 1/4 inch away from the edge. Then, take the needle back down through both layers, right next to the first stitch, creating a diagonal line. Continue stitching in this manner, keeping your stitches evenly spaced and parallel to each other.
The whipstitch can be used to embellish a variety of sewing projects, such as clothing, bags, and home decor items. Experiment with different thread colors and stitch lengths to achieve the desired decorative effect. Remember to practice on scrap fabric before applying the whipstitch to your final project. With a little practice, you’ll be able to master the decorative whipstitch and add a personal touch to your sewing creations.
Trying Your Hand at the Blanket Stitch
Give the blanket stitch a try and discover how it can add a charming and functional touch to your sewing projects. The blanket stitch is a versatile stitch that can be used for various purposes, such as finishing raw edges, attaching appliques, or creating decorative borders. It’s known for its distinctive V-shaped stitches and is commonly used in projects like blankets, quilts, and felt crafts.
To start, thread your needle with a suitable thread and knot the end. Position the fabric with the edge facing you. Insert the needle from back to front, about a quarter inch away from the fabric edge. Leave a small loop of thread on the surface of the fabric and insert the needle back through the loop, pulling the thread snugly. Repeat this process, creating evenly spaced stitches along the fabric edge. Ensure that each stitch catches both layers of fabric, creating a secure and neat finish.
The blanket stitch not only adds a decorative element to your projects but also helps prevent fraying and adds durability. It can be customized by using different thread colors or varying the stitch length and spacing. With practice, you’ll become proficient in creating clean and even blanket stitches, enhancing the overall appearance of your sewing projects.
Finishing Touches and Troubleshooting Tips
To add those final touches and troubleshoot any issues that may arise, here are some helpful tips and techniques for perfecting your sewing projects.
When it comes to finishing touches, one important step is pressing your seams. Use an iron to press open or to one side, depending on the project. This will give your work a professional look.
Another finishing touch is to trim any excess threads. These can be distracting and take away from the overall appearance of your sewing. Use sharp scissors to carefully trim any loose threads, making sure not to cut into the fabric.
If you encounter any issues while sewing, such as skipped stitches or tangled threads, there are a few troubleshooting tips you can try.
First, check your needle. A bent or dull needle can cause stitching problems. Replace it if necessary.
Also, make sure you’re using the correct thread tension for your project. Adjusting the tension dial on your sewing machine can help improve stitch quality.
Lastly, take your time when sewing to avoid mistakes. Rushing can lead to uneven stitches or missed seams. Remember, practice makes perfect, so don’t be discouraged if you encounter challenges along the way.
With these finishing touches and troubleshooting tips, you’ll be well on your way to creating beautiful sewing projects.