
Are you tired of the same old store-bought curtains that never quite fit your style? Well, it’s time to take matters into your own hands and unleash your creativity!
In this step-by-step guide, we will walk you through the process of creating your own curtains from scratch. From selecting the perfect fabric to adding those finishing touches, you’ll learn all the necessary skills and techniques to transform your windows into a beautiful reflection of your personal taste.
So, why settle for mundane when you can have marvelous? Get ready to embark on a journey of DIY curtain-making and discover the joy of crafting something unique that will truly enhance your living space.
Choosing the Right Fabric
When choosing the fabric for your curtains, consider the style and functionality you desire. The fabric you select will greatly impact the overall look and feel of your curtains, so it’s important to choose wisely.
First, think about the style of your room. If you have a more traditional or formal aesthetic, heavier fabrics like velvet or silk can add an elegant touch. For a more casual or contemporary look, you may opt for lighter fabrics such as linen or cotton.
Next, consider the functionality of your curtains. Do you want them to block out light and provide privacy, or are you more concerned with adding a decorative element to your space? If light control is important to you, consider thicker fabrics or ones with a blackout lining. If you’re primarily looking for decorative curtains, sheer fabrics or those with interesting patterns and textures could be a great choice.
Ultimately, the fabric you choose shouldn’t only complement your overall decor but also meet your specific needs.
Measuring Your Windows
To ensure a perfect fit for your curtains, start by measuring your windows accurately. This step is crucial in ensuring that your curtains will hang properly and cover the entire window. To begin, gather your measuring tape and a notepad to record your measurements. Start by measuring the width of your window frame from one side to the other. Make sure to measure at the top, middle, and bottom of the frame, as windows can sometimes be uneven. Write down the largest measurement you obtain.
Next, measure the height of your window, starting from the top of the frame to the bottom. Again, measure at the left, center, and right side of the window, and record the longest measurement. It’s important to note that if you plan to have floor-length curtains, you should measure from the top of the frame to the floor.
Once you have your width and height measurements, you can decide on the curtain length and width you need. If you prefer a fuller look, add a few inches to the width measurement. For the length, consider whether you want your curtains to touch the floor or hang slightly above it.
Selecting the Curtain Style
Now that you have measured your windows, it’s time to select the perfect curtain style. Choosing the right style for your curtains can greatly enhance the overall look and feel of your room. There are various factors to consider when making this decision, such as the room’s decor, the amount of natural light you want to let in, and your personal preferences.
One popular curtain style is the classic tab-top curtain. These curtains have fabric loops at the top that slide onto a curtain rod, creating a relaxed and casual look. They’re great for rooms with a more laid-back and informal vibe.
If you prefer a more tailored and polished look, consider pencil pleat curtains. These curtains have a neat and uniform appearance thanks to the evenly spaced pleats that run across the top. They work well in both traditional and modern settings.
For a touch of elegance and sophistication, you might opt for eyelet curtains. These curtains have metal rings sewn directly onto the fabric, allowing them to slide smoothly onto a curtain rod. Eyelet curtains create soft, even folds and are perfect for adding a luxurious touch to any room.
Remember to also consider the fabric and pattern of your curtains. Solid colors can create a clean and minimalist look, while patterns can add visual interest and personality to your space. By carefully choosing the curtain style that best suits your preferences and needs, you can transform your windows and elevate your home decor.
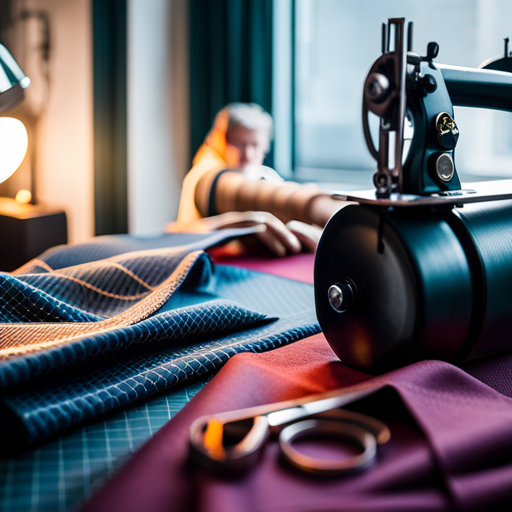
Gathering the Necessary Tools and Materials
To complete your curtain project, gather all the necessary tools and materials. Having everything you need will ensure a smooth and efficient process.
First, you’ll need measuring tools such as a tape measure and a ruler to accurately measure the dimensions of your windows.
Next, gather your chosen fabric. Consider the type and weight of the fabric based on your desired curtain style and the amount of light you want to filter. Don’t forget to purchase thread that matches your fabric color.
You’ll also need a sewing machine or a needle and thread if you prefer hand sewing. Pins and scissors are essential for cutting and pinning the fabric in place. A fabric marker or chalk will come in handy for marking measurements and folding lines.
Finally, don’t overlook the importance of a good iron and ironing board to ensure neat and polished curtains.
Cutting and Preparing the Fabric
Start by measuring and marking the dimensions of your chosen fabric for your curtains. This step is crucial to ensure that your curtains fit perfectly and look professional. Lay out your fabric on a large, flat surface, such as a cutting table or the floor. Smooth out any wrinkles or creases so that you have a clear and even surface to work with. Use a measuring tape to determine the length and width of your curtains, taking into account any additional allowances for hems or pleats. Mark these measurements with a fabric marker or pins, making sure to be precise and accurate.
Once you have marked the dimensions, it’s time to cut the fabric. Using sharp fabric scissors, carefully cut along the marked lines, ensuring clean and straight edges. Take your time and make sure to follow the measurements precisely. If your curtains require multiple panels, repeat this process for each panel, making sure they’re all identical in size.
After cutting the fabric, it’s important to prepare it for sewing. Finish the raw edges of the fabric by either serging them with a serger machine or using a zigzag stitch on your sewing machine. This will prevent fraying and give your curtains a professional finish. Press the fabric with an iron to remove any wrinkles and create crisp, smooth edges. Now, your fabric is ready to be sewn into beautiful curtains.
Sewing the Curtain Panels
To sew the curtain panels, gather your fabric and set up your sewing machine. Make sure you have all the necessary supplies nearby, such as thread, scissors, and pins.
Measure and cut your fabric according to the desired length and width of your curtains, adding a few inches for hemming.
Fold over each edge of the fabric about half an inch and iron them flat. This will create a neat and clean edge for sewing. Pin the folded edges in place to prevent them from shifting while sewing.
Set up your sewing machine with the appropriate thread color and needle size. Begin by sewing a straight stitch along each folded edge, backstitching at the beginning and end to secure the seams. Take your time and sew carefully to ensure straight and even stitches.
Once all the edges are sewn, remove the pins and press the seams with an iron to give your curtains a professional finish.
Congratulations, you have successfully sewn your curtain panels!
Adding Finishing Touches
Now it’s time to put the final touches on your curtains, giving them a polished and professional look.
Adding the finishing touches will elevate your curtains from homemade to designer quality.
Start by ironing your curtains to remove any wrinkles and give them a crisp appearance. This step is especially crucial if you used a fabric that’s prone to wrinkling.
Next, hem the bottom of your curtains to create a clean and polished edge. Fold the fabric up and pin it in place before sewing a straight stitch along the edge.
To add a decorative touch, consider adding trim or piping along the edges or at the top of the curtains. This won’t only give them a custom look but also hide any imperfections in your sewing.
Finally, attach the curtain rings or hooks to the top of your curtains, ensuring they’re evenly spaced.
Now step back and admire your finished curtains. They’re ready to be hung and will undoubtedly enhance the beauty of your space.
Hanging and Enjoying Your Custom Curtains
Hang your custom curtains with care and prepare to enjoy the transformation they bring to your space. After all the hard work you put into creating your own curtains, it’s time to reap the rewards.
Start by gathering all the necessary tools and materials. You’ll need a curtain rod, brackets, screws, and a level. Measure the height of your window and mark the desired position for the rod brackets. Use a level to ensure that the brackets are perfectly aligned. Once the brackets are securely attached, slide the curtain rod into place.
Now comes the fun part – hanging the curtains! Slide the curtain rings onto the rod and attach the curtains to the rings. Make sure the curtains are evenly spaced and hang straight. Step back and admire your handiwork.
Your custom curtains not only add a personal touch to your space, but they also provide privacy and block out unwanted light. Enjoy the cozy ambiance they create and bask in the satisfaction of a job well done.