
They say that clothes make the man, and what better way to make a statement than by designing and creating your own t-shirts? Whether you’re looking to express your creativity, promote your brand, or simply stand out from the crowd, the possibilities are endless.
But where do you begin? In this discussion, we will guide you through the process of choosing the perfect design, selecting the right fabric, and bringing your vision to life.
So, if you’re ready to turn heads and leave a lasting impression, keep reading to discover the art of designing and creating your own t-shirts.
Choosing a T-shirt Design
When choosing a T-shirt design, consider your personal style and what message you want to convey. Your T-shirt is a reflection of who you’re and what you believe in, so it’s important to choose a design that truly represents you.
Think about what colors, patterns, and graphics resonate with you the most. Do you prefer bold and vibrant designs or something more minimalistic? Consider the message you want to convey with your T-shirt. Is it a funny slogan, a political statement, or simply a way to show support for a cause you care about? Whatever it may be, make sure it aligns with your values and beliefs.
Additionally, think about the occasion or setting where you plan to wear your T-shirt. Is it for a casual outing with friends or a more formal event? Adjust your design accordingly to fit the context.
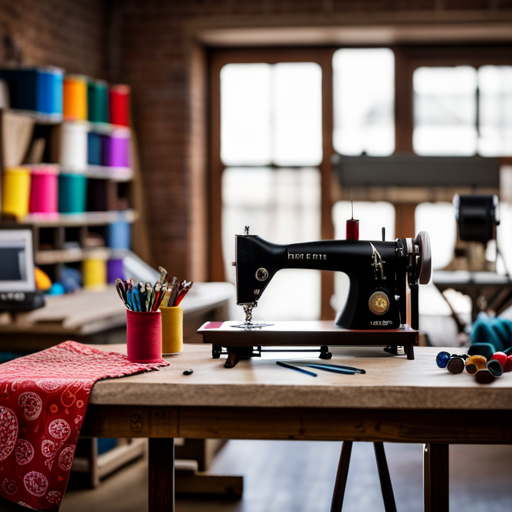
Selecting the Right Fabric
To choose the right fabric for your T-shirt, consider factors such as comfort, durability, and desired aesthetic.
Comfort is key when it comes to selecting the fabric for your T-shirt. Look for materials that feel soft and smooth against your skin, such as cotton or a cotton blend. These fabrics are breathable and will keep you cool throughout the day.
Durability is another important factor to consider. You want your T-shirt to last, so opt for fabrics that are resistant to wear and tear, like polyester or a polyester blend. These fabrics are known for their strength and ability to withstand frequent washing.
Lastly, think about the desired aesthetic of your T-shirt. Do you want a fabric with a vibrant color or a subtle texture? Consider fabrics like silk or linen for a luxurious and elegant look, or choose a fabric with a unique pattern or print to make a statement.
Creating Your Design Concept
Consider your style and personal interests when creating your design concept for a custom T-shirt. Your T-shirt should reflect who you’re and what you love. Start by brainstorming ideas that resonate with you. What’re your passions? What makes you unique? Take some time to explore different themes and concepts that align with your personality.
Once you have a general idea, it’s time to create a visual representation of your design concept. Sketch out your ideas on paper or use a design software to bring your vision to life. Think about the placement of your design on the T-shirt. Do you want it front and center or off to the side? Experiment with different fonts, colors, and graphics to create a design that stands out.
Consider the message you want to convey through your design. Is it funny, inspiring, or thought-provoking? Think about how you want people to feel when they see your T-shirt. A well-designed concept won’t only catch people’s attention but also leave a lasting impression.
Sketching and Digitizing Your Design
To bring your design concept to life, start by sketching your ideas on paper or using design software. Sketching is an essential step in the design process as it allows you to visualize your ideas and make adjustments before committing to a final design. Grab a pencil and paper or open up your favorite design software and begin transferring your concept onto the blank canvas.
When sketching, focus on capturing the essence of your design. Start with rough outlines and basic shapes, gradually adding details as you go. Don’t worry about perfection at this stage; the goal is to get a general idea of how your design will look.
Once you have your sketch, it’s time to digitize it. If you sketched on paper, you can scan or take a clear photo of your drawing and import it into design software. From there, you can trace over your sketch using digital tools to create a clean and polished design.
If you prefer to skip the traditional sketching process, you can start directly on the computer using design software. Many programs offer drawing tools that mimic the feel of pencil and paper, allowing you to create your design digitally from the beginning.
Choosing Colors and Placement
After digitizing your design, the next step is to carefully select the colors and determine the optimal placement for your design on the t-shirt. Choosing the right colors is crucial in creating a visually appealing and impactful design. Consider the message or theme of your design and choose colors that complement or enhance it. Vibrant and contrasting colors can make your design stand out, while muted or monochromatic colors can create a more subtle and sophisticated look.
Placement is equally important as it can affect how your design is perceived. Think about the size and shape of your design, as well as the dimensions of the t-shirt. You want your design to be easily visible and not overshadowed by seams or folds. The front and back of the t-shirt are popular placement options, but you can also consider the sleeves or the sides for a more unique and creative look.
Before finalizing your color choices and placement, it’s a good idea to create mock-ups or prototypes. This will allow you to see how the colors interact with each other and how the design looks when placed on the t-shirt. You can experiment with different color combinations and placements until you find the perfect combination that brings your design to life.
Printing and Transferring Your Design
To print and transfer your design onto the t-shirt, you’ll need to use heat transfer paper and an iron or a heat press machine. Heat transfer paper is specially coated to allow the design to adhere to the fabric when heat is applied. It’s available in different sizes, so make sure to choose the one that fits your design.
First, print your design onto the heat transfer paper using an inkjet printer. Remember to flip the image horizontally before printing, especially if your design includes text or is asymmetrical. This will ensure that the design transfers onto the t-shirt correctly.
Next, preheat your iron or heat press machine to the appropriate temperature as specified by the heat transfer paper instructions. Place the t-shirt on a flat surface and position the design on the desired spot. Gently place the iron or heat press machine on top of the design, applying even pressure for the recommended time.
Allow the transfer to cool down before peeling off the backing paper. This will ensure that the design adheres properly to the fabric. If any parts of the design don’t transfer completely, reapply heat and pressure until it does.
Congratulations! You have successfully printed and transferred your design onto the t-shirt. Now it’s time to show off your creativity and wear your unique custom-made t-shirt with pride.
Adding Finishing Touches
Now that your design is securely transferred onto the t-shirt, let’s add the finishing touches to make it truly stand out.
One way to enhance your design is by using fabric paint or markers to add vibrant colors and intricate details. You can use stencils or freehand techniques to create unique patterns or images.
Additionally, consider adding some texture to your design by using fabric glue and attaching small embellishments like beads, sequins, or patches. These little additions can give your t-shirt a personalized and eye-catching look.
Another idea is to experiment with different types of stitching. You can use embroidery thread to create decorative stitches around your design or add some hand-sewn accents. This adds a handmade touch and can make your t-shirt truly one-of-a-kind.
Lastly, don’t forget about the sleeves, collar, and hem of your t-shirt. You can easily modify these areas by cutting, tying, or folding them to create interesting and fashionable designs.
Caring for Your Custom T-shirts
To keep your custom t-shirts looking their best, it’s important to follow proper care instructions. Taking care of your custom t-shirts won’t only help them last longer, but also maintain their vibrant colors and designs.
First and foremost, always check the care label attached to your t-shirt for specific washing instructions. Most custom t-shirts can be safely machine washed, but it’s best to use a gentle cycle and cold water to prevent any damage. Turn your t-shirts inside out before washing to protect the design. Avoid using bleach or harsh detergents, as they can fade the colors and weaken the fabric.
When drying your custom t-shirts, it’s best to air dry them by laying them flat or hanging them up. Avoid using high heat in the dryer, as it can cause shrinkage and damage the print. If you need to iron your t-shirts, use a low heat setting and iron them inside out.
Following these simple care instructions will help ensure that your custom t-shirts stay in great condition for a long time.