
Ever wondered if you could create your own pillow covers? Well, wonder no more. With a few basic sewing skills, you can easily make DIY pillow covers for your home. Whether you’re a complete beginner or just looking to brush up on your sewing skills, this discussion will guide you through the process step by step.
From choosing the right fabric to adding decorative accents, you’ll learn all the tips and tricks to create beautiful pillow covers that will transform the look of your space.
So, let’s get started and discover the world of DIY pillow covers together.
Choosing the Right Fabric
When choosing the fabric for your DIY pillow covers, consider the durability and aesthetic appeal that best suits your personal style. The fabric you choose will determine the overall look and feel of your pillow covers, so it’s important to make the right decision.
Start by thinking about the purpose of your pillows. If they’re purely decorative, you can opt for more delicate fabrics like silk or velvet. However, if you plan to use your pillows for everyday comfort and support, it’s best to choose a fabric that’s durable and easy to clean, such as cotton or linen.
Additionally, consider the color and pattern of the fabric. Do you want your pillows to be bold and eye-catching or do you prefer a more subtle and neutral design? Take into account the existing colors and patterns in your space to ensure that your pillow covers complement the overall aesthetic.
Measuring and Cutting the Fabric
To begin measuring and cutting the fabric for your DIY pillow covers, gather your materials and prepare a clean, flat surface. You’ll need a measuring tape, fabric scissors, and the fabric of your choice.
Lay the fabric flat on the surface and smooth out any wrinkles or folds. Take the measuring tape and measure the dimensions of your pillow insert. Start by measuring the width and length of the insert. Add an extra inch to each measurement to account for seam allowance.
Mark these measurements on the fabric using a fabric pen or chalk. Use the measuring tape to draw straight lines connecting the marks.
Next, carefully cut along the lines using the fabric scissors. Take your time and make sure to cut as straight as possible. Once you have cut out the fabric, double-check the dimensions to ensure accuracy. Remember, it’s always better to measure twice and cut once.
Now you have perfectly sized fabric pieces ready to be sewn into beautiful pillow covers.
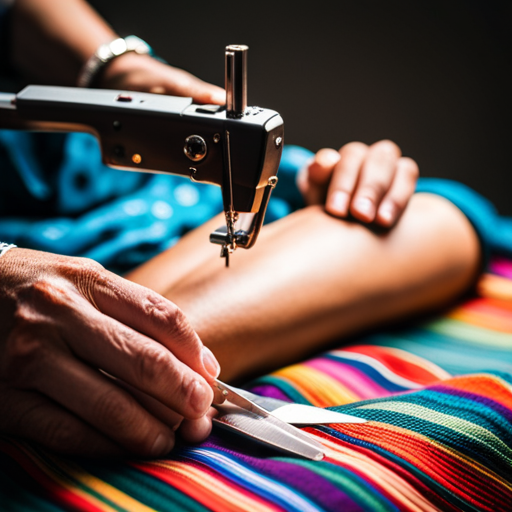
Sewing the Side Seams
Start by folding the fabric pieces in half, right sides together, and aligning the raw edges. This step is crucial in creating a clean and professional finish for your pillow cover. Once the fabric is folded and aligned, use pins to secure the edges in place. This will prevent any shifting or misalignment during the sewing process.
Next, it’s time to sew the side seams. Using a sewing machine, start at the top corner of the folded edge and sew all the way down to the bottom corner, using a straight stitch. Be sure to backstitch at the beginning and end of each seam to secure the stitches.
After sewing both side seams, remove the pins and turn the pillow cover right side out. Take a moment to admire your work so far – you’re almost done!
Now that the side seams are complete, you can move on to the next step of finishing the pillow cover, which will involve sewing the bottom seam. But before you do that, make sure to press the side seams with an iron to give them a crisp and professional look.
Adding a Zipper or Button Closure
Now that you have successfully sewn the side seams, it’s time to move on to the next step of adding a zipper or button closure to your DIY pillow cover. This step will ensure that you can easily remove and clean the cover whenever needed.
To add a zipper closure, start by measuring the length of the opening on the back of the pillow cover. Cut a piece of zipper that’s slightly longer than this measurement. Place the zipper face down on the right side of the fabric, aligning the edges. Pin it in place and sew along the edges using a zipper foot attachment on your sewing machine. Once the zipper is securely in place, flip the fabric over and carefully open the zipper.
If you prefer to use a button closure, sew buttonholes on one side of the pillow cover opening. To do this, mark the desired locations for the buttonholes using chalk or disappearing ink. Attach a buttonhole foot to your sewing machine and sew the buttonholes according to the instructions in your sewing machine manual. Then, sew buttons onto the opposite side of the opening.
Adding a zipper or button closure to your DIY pillow cover is a simple way to ensure that your pillow stays secure inside while still allowing for easy removal and cleaning. With these steps, you’ll be able to complete your pillow cover project with confidence.
Creating a Slipcover Design
Consider the style and measurements of your pillow as you begin to create a slipcover design for your DIY project.
The slipcover design is an essential part of your pillow cover, as it determines how the finished product will look and fit.
Start by examining the style of your pillow. Is it a traditional square shape, or does it have unique contours? Take note of any special features, such as piping or pleats, that you want to incorporate into your slipcover design.
Next, measure your pillow accurately. Take into account both the width and length, as well as the depth. These measurements will determine the size of your slipcover and ensure a snug fit.
Once you have considered the style and measurements of your pillow, it’s time to get creative with your slipcover design. You can choose from various options, such as a simple envelope closure or a more intricate design with buttons or ties.
Remember to select a fabric that complements your overall decor and consider adding any additional embellishments, such as decorative trims or embroidery, to personalize your slipcover.
With a well-thought-out slipcover design, you can transform your pillow into a stylish and functional piece for your home.
Adding Decorative Accents
Are you looking to elevate the style of your DIY pillow covers with some decorative accents? Adding decorative accents to your pillow covers can instantly transform them from basic to eye-catching. There are several ways you can incorporate decorative elements into your pillow covers to enhance their overall aesthetic.
One simple way to add decorative accents is by using trim or piping. Choose a trim or piping that complements the fabric of your pillow cover and sew it along the edges. This will give your pillow cover a polished and finished look.
Another option is to add embellishments such as buttons, beads, or embroidery. These small details can add a touch of personality and uniqueness to your pillow covers. Sew them onto the surface of the fabric or create intricate designs using embroidery thread.
If you want to make a bold statement, consider adding appliques or patches. These can be made from contrasting fabrics or even recycled materials such as old clothing or scraps. Appliques and patches can be sewn onto the pillow cover to create interesting patterns or designs.
Finishing Touches and Cleaning
To complete your DIY pillow covers, let’s now focus on adding the finishing touches and ensuring they’re properly cleaned.
After you have sewn the pillow cover and added any decorative accents, it’s important to give your pillows a final touch to make them look polished and professional. One simple way to do this is by pressing your pillow covers with an iron. This will help to smooth out any wrinkles and give your pillows a crisp, finished look. Just be sure to follow the fabric’s care instructions and use the appropriate heat setting on your iron.
In addition to pressing, you may also want to consider adding a closure to your pillow covers. This could be as simple as sewing on a button or adding a zipper. Not only will this give your pillows a clean and tailored appearance, but it will also make them easier to remove and clean when necessary.
Speaking of cleaning, it’s important to keep your DIY pillow covers looking fresh and clean. Most pillow covers can be safely machine washed, but be sure to check the fabric’s care instructions before tossing them in the washing machine. Use a gentle cycle and mild detergent to avoid damaging the fabric. If your pillow covers are made of delicate or vintage fabrics, it may be best to spot clean them instead.
Tips and Tricks for Beginners
If you’re new to making DIY pillow covers, here are some helpful tips and tricks to get you started.
First, always measure your pillows accurately. Use a measuring tape and take the dimensions of your pillow, adding an inch to each side for seam allowance. This will ensure a perfect fit.
Secondly, choose the right fabric for your covers. Cotton or linen fabrics are great options as they’re easy to work with and durable. Avoid stretchy or slippery fabrics that may be difficult to sew.
Thirdly, invest in a good quality sewing machine. While hand sewing is possible, a machine will make the process much faster and more efficient.
Additionally, don’t forget to prewash your fabric before starting. This will prevent any shrinkage or color bleeding after the covers are made.
Lastly, practice your sewing skills on scrap fabric before working on the actual pillow covers. This will help you get a feel for the machine and build your confidence.
With these tips in mind, you’ll be able to create beautiful DIY pillow covers in no time!