
They say that a stitch in time saves nine, but when it comes to sewing patterns, understanding them can feel like unraveling a tangled thread. Don’t fret, because in this discussion, you will discover the secrets to deciphering those mysterious pattern instructions and markings.
From decoding pattern symbols to making sense of cutting layouts, this comprehensive guide will equip you with the knowledge and skills to navigate the world of sewing patterns with confidence.
So, if you’re ready to unlock the secrets behind those pattern envelopes, join us as we unravel the mysteries of understanding sewing patterns.
Understanding Pattern Terminology
To better understand sewing patterns, it’s important to familiarize yourself with the terminology used within them. This will help you navigate through the instructions and make sense of the various components of a pattern.
One key term you’ll come across is ‘seam allowance.’ This refers to the extra fabric that extends beyond the stitching line. Seam allowances are important because they allow you to make alterations or adjustments if needed.
Another term to know is ‘notions.’ Notions are the small items or accessories that are necessary for completing a sewing project, such as buttons, zippers, or elastic.
Understanding the term ‘dart’ is also crucial. A dart is a folded triangular or diamond-shaped fabric that’s sewn to shape the fabric around curves or provide a tailored fit.
Lastly, you’ll frequently encounter the term ‘grainline.’ The grainline indicates the direction in which the fabric should be placed on the pattern.
Paying attention to these pattern terminologies will enhance your understanding of sewing patterns and enable you to create beautiful garments with ease.
Choosing the Right Size
Now that you understand pattern terminology and how to navigate through instructions, it’s time to focus on choosing the right size for your sewing project. Choosing the correct size is crucial to ensure that your finished garment fits you perfectly.
Most sewing patterns have multiple size options, so it’s essential to know how to select the one that matches your measurements accurately.
To choose the right size, start by measuring yourself accurately. Use a flexible measuring tape and follow the pattern’s measurement chart to determine your bust, waist, and hip measurements. Compare your measurements with the size chart provided in the pattern instructions.
If your measurements fall between two sizes, it’s generally recommended to select the larger size and make alterations as needed.
Keep in mind that each pattern company may have slightly different size ranges, so it’s important to refer to the specific size chart for the pattern you’re working with.
Additionally, consider the ease allowance mentioned in the pattern instructions. Ease allowance refers to the additional space built into the pattern for ease of movement and comfort. If you prefer a more fitted garment, you may want to select a size with less ease.
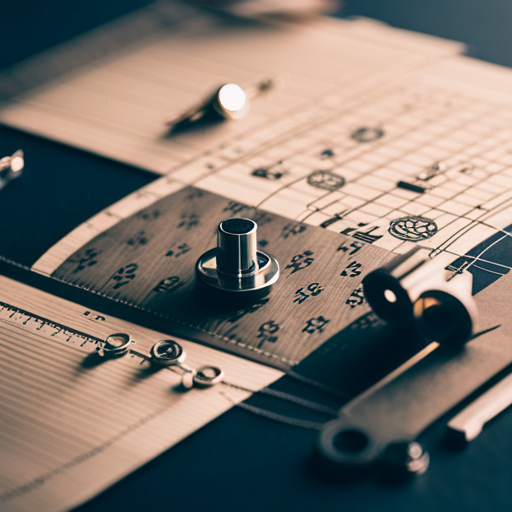
Decoding Pattern Markings and Symbols
Understanding pattern markings and symbols is essential for successfully interpreting sewing instructions and achieving accurate results. When you open a sewing pattern, you’ll notice various markings and symbols that provide important information for constructing your garment. These markings serve as guides and references, helping you understand where to place seams, darts, pockets, and other elements of your project.
One common marking you’ll encounter is the grainline arrow, which indicates the direction in which the pattern piece should be aligned with the fabric’s grain. This is crucial for ensuring that your garment hangs and drapes correctly.
Seam allowance markings indicate the width of the seam allowance to be added when cutting and sewing the fabric pieces together. These markings can be seen as dotted lines or solid lines with numbers indicating the seam allowance measurement.
Symbols are also used to convey specific instructions. For example, notches are small triangles or diamonds that help match and align pattern pieces accurately. They indicate where pieces should be joined and ensure that everything lines up correctly. Other symbols may indicate the placement of buttons, zippers, or pockets.
Reading the Cutting Layout
When decoding pattern markings and symbols, you have gained a solid foundation for reading and understanding sewing patterns. Now, let’s delve into the subtopic of ‘Reading the Cutting Layout’.
The cutting layout is a crucial element of a sewing pattern as it provides instructions on how to arrange and cut the pattern pieces from your fabric. It ensures that you make the most efficient use of your fabric while also considering pattern grainlines, fabric direction, and any pattern matching requirements.
The cutting layout usually consists of a diagram that represents the fabric, with pattern pieces placed on top. It may also include arrows indicating the direction of the fabric grain and symbols representing specific pattern markings, such as notches and darts.
It’s important to carefully study the cutting layout before cutting your fabric to ensure accuracy and avoid costly mistakes. Pay attention to any pattern-specific instructions regarding layout orientation and placement. Additionally, consider the fabric type and pattern complexity, as these factors may influence your cutting approach.
Following the Sewing Instructions
To ensure successful completion of your sewing project, it’s essential to carefully follow the instructions provided. Following the sewing instructions will help you avoid mistakes and achieve the desired outcome.
Start by reading the instructions thoroughly before you begin. Pay attention to the order of the steps and any specific techniques mentioned. Make sure to understand the terminology used in the instructions, such as seam allowance and right side.
Take note of any pattern markings or symbols that indicate where to sew, fold, or cut. If the instructions include illustrations or diagrams, refer to them for visual guidance.
As you progress through the project, check off each step as you complete it to keep track of your progress. If you encounter any difficulties or uncertainties, refer back to the instructions or consult a sewing resource for clarification.
Remember to take your time and work at a pace that’s comfortable for you. By following the sewing instructions diligently, you’ll be on your way to creating a beautiful and well-made garment or project.
Making Sense of Notions and Fabric Requirements
When it comes to successfully completing your sewing project, one important aspect to consider is understanding the notions and fabric requirements.
Notions refer to the various tools and accessories you’ll need to complete your project, such as buttons, zippers, thread, and interfacing. It’s crucial to carefully read the pattern instructions to determine the specific notions required for your project.
Additionally, fabric requirements play a vital role in ensuring that you have enough material to complete your project. The pattern envelope or instructions will provide information on the type and amount of fabric needed, as well as any additional supplies such as lining or interfacing.
It’s essential to pay attention to these requirements to avoid running out of fabric or purchasing the wrong type. Take note of the recommended fabric weight and fiber content, as these can greatly affect the final outcome of your project.
Modifying and Adjusting Patterns
Consider modifying and adjusting patterns to achieve the perfect fit and style for your sewing project. Sewing patterns are a great starting point, but sometimes they need a little tweaking to suit your body shape and personal preferences. Whether you need to make a pattern larger or smaller, adjust the length, or change the neckline, modifying patterns allows you to create a garment that fits you like a glove.
To begin, take accurate measurements of your body and compare them to the pattern’s size chart. If your measurements fall into different sizes, you may need to blend between sizes or make additional adjustments. For example, if you have a smaller bust but wider hips, you may need to narrow the pattern at the waist.
When making adjustments, it’s important to use muslin or a similar inexpensive fabric to create a test garment, also known as a toile. This allows you to test the fit and make any necessary changes before cutting into your final fabric.
Modifying patterns also allows you to add your own personal touch to a garment. You can customize the length of a skirt, change the shape of a collar, or even combine elements from different patterns to create a unique design.
Remember that pattern adjustments may require trial and error, so be patient and keep experimenting until you achieve the desired fit and style. With practice, you’ll become more confident in modifying patterns to create garments that are tailor-made just for you.
Troubleshooting Common Pattern Problems
If you encounter common pattern problems, such as mismatched seam lines or incorrect fabric placement, there are simple solutions to fix these issues.
When you notice that the seam lines don’t match up properly, the first thing you should do is check the pattern pieces to make sure they’re cut accurately. If they aren’t, you can carefully trim or adjust them to align correctly.
Another common problem is incorrect fabric placement, which can result in a garment that doesn’t drape or fit correctly. To solve this, double-check the pattern instructions and make sure you’re placing the fabric right side up and following any directional markings. If you’ve already cut the fabric incorrectly, you can try repositioning the pattern pieces or cutting new ones if necessary.
Additionally, if you find that the pattern instructions aren’t clear or easy to follow, take a moment to read through them carefully and refer to any diagrams or illustrations provided. If you’re still having trouble, don’t hesitate to seek help from experienced sewers or online sewing communities.
With a little patience and practice, you’ll be able to troubleshoot and fix common pattern problems with ease.