
Looking to conquer the winter chill in style? Look no further than sewing your own winter scarf and beanie set. With your own two hands, you can create a cozy and fashionable accessory that will have heads turning.
But before you grab your sewing machine, there are a few key steps you need to know. From choosing the perfect fabrics to adding personalized touches, this guide will take you through the process of creating a winter set that is uniquely yours.
So, are you ready to take on the challenge and create a winter ensemble that will keep you warm and stylish all season long?
Choosing the Right Fabrics
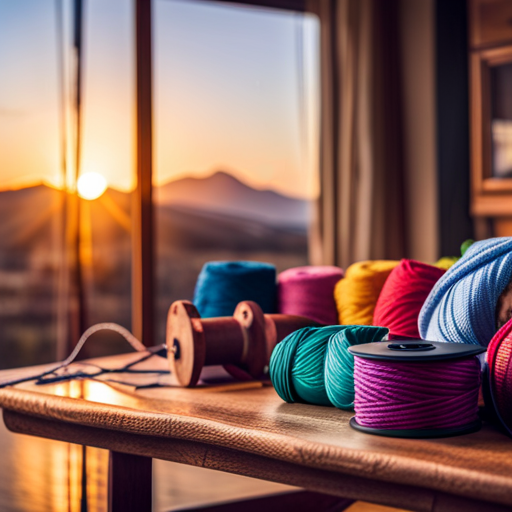
When sewing a winter scarf and beanie set, it’s important to choose the right fabrics to ensure warmth and comfort. Start by considering fabrics that are known for their insulation properties, such as wool, fleece, and flannel.
Wool is a popular choice due to its natural ability to retain heat and regulate body temperature. It’s also soft and durable, making it ideal for winter accessories.
Fleece is another excellent option as it’s lightweight, breathable, and traps heat effectively. Additionally, it wicks away moisture, keeping you dry and cozy.
Flannel, with its brushed surface, provides a soft and cozy feel. It offers good insulation and is often used for scarves to provide warmth without adding bulk.
To enhance warmth, you can also consider lining your scarf and beanie with a layer of polar fleece or faux fur. These fabrics add an extra layer of insulation and create a luxurious feel.
Measuring and Cutting the Scarf and Beanie
To ensure a precise fit for your winter scarf and beanie set, begin by accurately measuring and cutting the fabric. This step is crucial in creating a well-fitting and comfortable set that will keep you warm during the cold winter months.
First, measure the length of the scarf you desire. Wrap the measuring tape around your neck, allowing for some extra length to create a cozy drape. Once you have the desired length, mark it on the fabric and cut along the line using sharp fabric scissors.
Next, measure the width of the scarf. A standard width is around 8 to 10 inches, but feel free to adjust it based on your personal preference. Again, mark the measurement on the fabric and cut it accordingly.
When measuring and cutting the fabric for the beanie, take the circumference of your head and add a bit of ease for a comfortable fit. Mark this measurement on the fabric and cut it out, allowing for seam allowances. Remember to double-check your measurements before cutting to avoid any mistakes.
With precise measurements and clean cuts, you’re now ready to move on to the next step of sewing your winter scarf and beanie set.
Sewing the Scarf
Start by folding the fabric in half lengthwise, with the right sides facing each other. This will create a long rectangle shape. Make sure to align the edges and corners as accurately as possible.
Once the fabric is folded, use pins to secure the layers together along the long edge. This will prevent the fabric from shifting while you sew.
Next, thread your sewing machine with a matching thread color and select a straight stitch. Begin sewing along the long edge, starting about half an inch from the folded edge. Sew all the way down the length of the fabric, making sure to backstitch at the beginning and end to secure the stitches.
After sewing the long edge, remove the pins and turn the fabric right side out. Use a blunt object, such as a knitting needle or chopstick, to gently push out the corners and edges for a crisp finish.
To complete the scarf, sew a straight stitch along the remaining three edges, making sure to backstitch at the beginning and end. Trim any excess threads and give the scarf a final press with an iron.
Your winter scarf is now ready to keep you warm and stylish during the cold months.
Adding Embellishments and Details
Now let’s explore ways to add decorative touches and unique details to your winter scarf and beanie set.
Adding embellishments and details is a great way to personalize your winter accessories and make them stand out.
One simple way to add a pop of color is by using contrasting thread to sew on decorative stitches along the edges of your scarf. This will create a beautiful and eye-catching effect.
You can also consider adding small fabric appliques or patches to your scarf and beanie. These can be in the shape of snowflakes, stars, or even cute animals.
Another option is to attach buttons or beads to your accessories. This won’t only add visual interest but also create a tactile experience when wearing them.
Additionally, you can experiment with different types of yarn and textures to create unique patterns and designs. Try incorporating different knitting or crochet techniques such as cables or lace stitches.
Don’t be afraid to let your creativity shine and make your winter scarf and beanie set truly one-of-a-kind.
Sewing the Beanie
To sew the beanie, begin by cutting out the pattern pieces according to your desired size and style. Make sure to choose a fabric that’s warm and comfortable for the winter season. Once you have the fabric ready, place the pattern pieces on top and secure them with pins. Use sharp fabric scissors to carefully cut along the edges of the pattern. Take your time to ensure accurate cuts.
Next, you’ll need to sew the beanie together. Start by sewing the side seams together, right sides facing each other. Use a straight stitch and backstitch at the beginning and end to secure the seams. Trim any excess fabric and press the seams open.
Now, fold the bottom edge of the beanie up by about an inch to create a cuff. Pin it in place and sew along the folded edge to secure it. This will give the beanie a neat and finished look.
Lastly, sew the top of the beanie closed. Pin the remaining edges together and sew along the top, leaving a small opening for turning it right side out. Trim any excess fabric and turn the beanie right side out through the opening. Hand-stitch the opening closed and press the beanie to remove any wrinkles.
Congratulations! You have successfully sewn a cozy beanie to complete your winter scarf and beanie set.
Finishing Touches: Hemming and Trimming
After successfully sewing the beanie, the next step in completing your winter scarf and beanie set is to focus on the finishing touches: hemming and trimming.
Hemming refers to folding and sewing the raw edges of the fabric to create a neat and polished look. To start hemming your scarf, fold the raw edge over by about half an inch and press it with an iron. Then, fold it over again by the same amount and press it once more. Pin the folded edge in place and sew along the edge, making sure to remove the pins as you go. Repeat this process for all sides of the scarf.
Now it’s time to trim any excess fabric or threads that may be sticking out. Using small, sharp scissors, carefully trim any loose threads or frayed edges. Be cautious not to cut into the fabric itself. Pay attention to areas where different pieces of fabric are joined together, such as the corners or where the scarf and beanie meet. Trim any excess fabric or threads to ensure a clean and professional finish.
Once you have completed the hemming and trimming, take a step back and admire your finished winter scarf and beanie set. The attention to detail and the extra effort you put into the finishing touches will make your creation stand out. Now you’re ready to bundle up and stay warm during the chilly winter months.
Styling and Wearing the Set
To complete your winter scarf and beanie set, let’s explore different ways to style and wear them. With a versatile scarf and beanie, you can create multiple looks that suit your personal style and keep you warm throughout the colder months.
For a casual and cozy look, drape the scarf around your neck and let it hang loosely. Pair it with your favorite jeans, a chunky sweater, and some ankle boots. This effortless style is perfect for a relaxed day out or running errands.
To add a touch of sophistication to your outfit, try the loop and tuck method. Wrap the scarf around your neck once, leaving one end longer than the other. Take the longer end and loop it through the wrapped part, creating a chic knot. This works well with a tailored coat, slim-fit pants, and heeled boots.
For a trendy and modern look, wear the beanie slightly slouchy on your head. Pair it with a leather jacket, skinny jeans, and ankle boots for an edgy vibe. This style is great for a night out or a casual brunch with friends.
Tips and Tricks for Successful Sewing
For successful sewing, incorporating these tips and tricks will ensure your winter scarf and beanie set turns out beautifully.
First and foremost, always start by prewashing your fabric to prevent any shrinkage or color bleeding. This step is crucial to ensure that your finished set maintains its shape and color.
Secondly, make sure to use the correct needle and thread for the type of fabric you’re working with. Using the wrong needle can result in broken stitches or snagged fabric.
Additionally, when cutting out your pattern pieces, take your time and use sharp fabric scissors to achieve clean and precise edges. Remember to transfer all markings accurately to ensure proper alignment during assembly.
Furthermore, when sewing the pieces together, use pins or clips to hold the fabric in place, preventing any shifting or misalignment. Take your time and sew slowly, especially around curves or corners, to maintain even stitching.
Lastly, don’t forget to press your seams open or to one side, using an iron set to the appropriate temperature for your fabric. Pressing will give your finished set a professional and polished look.