
They say that the devil is in the details, and when it comes to formal wear, nothing could be truer. Whether you have a special event coming up or simply want to enhance your sewing skills, mastering the techniques for sewing formal wear can take your creations to the next level.
From choosing the right fabric to adding those finishing touches that make a garment stand out, there are a multitude of skills to explore and perfect. So, if you’re ready to elevate your sewing game and create stunning formal wear pieces, buckle up and prepare to discover the secrets behind impeccable craftsmanship.
Choosing the Right Fabric
When selecting fabric for formal wear, it’s crucial to choose materials that not only complement the design but also provide comfort and durability. The fabric you choose will greatly impact the overall look and feel of your garment.
For formal occasions, you want to opt for fabrics that have a luxurious and elegant appearance. Silk and satin are popular choices for formal wear due to their smooth and shiny texture. They drape beautifully and add a touch of glamour to any outfit. However, keep in mind that silk and satin can be quite delicate and require special care.
If you’re looking for a more durable option, consider fabrics like crepe or brocade. These fabrics are known for their strength and durability, making them ideal for formal wear that needs to withstand the test of time. Additionally, they often have intricate patterns and textures, adding visual interest to your garment.
Remember to consider the season when choosing fabric for formal wear. Lightweight fabrics like chiffon and organza are perfect for warmer weather, while heavier fabrics like velvet and wool are better suited for colder temperatures.
Ultimately, the fabric you choose shouldn’t only enhance the design of your formal wear but also provide comfort and durability throughout the event.
Taking Accurate Measurements
Now that you have chosen the perfect fabric for your formal wear, it’s time to ensure a perfect fit by taking accurate measurements. Taking precise measurements is crucial to achieving a well-fitted garment that flatters your body shape.
To start, you’ll need a measuring tape, preferably a flexible one that can easily wrap around your body. Begin by measuring your bust, waist, and hips. For the bust, wrap the tape around the fullest part, ensuring it’s parallel to the ground. For the waist, measure at the narrowest part, which is usually right above the belly button. Finally, measure around the fullest part of your hips.
Additionally, take measurements for your shoulder width, arm length, and inseam. Remember to stand straight and relaxed while measuring, as slouching or pulling the tape too tight may lead to inaccurate results. It’s also helpful to have a friend assist you for more precise measurements.
Creating a Muslin Mock-up
To ensure a perfect fit for your formal wear, consider creating a muslin mock-up of your garment. A muslin mock-up is a trial version of your garment made from inexpensive cotton fabric called muslin. It allows you to test the fit and make any necessary adjustments before cutting into your expensive fashion fabric.
To create a muslin mock-up, start by transferring your pattern onto the muslin fabric. Cut out the pattern pieces and sew them together following the instructions. Don’t worry about finishing touches like hems or fancy closures at this stage. The goal is to focus on fit rather than aesthetics.
Once you’ve assembled your muslin mock-up, try it on. Pay attention to how it feels and looks on your body. Are there any areas that feel too tight or too loose? Are the darts in the right place? Is the length appropriate? Take note of any adjustments that need to be made.
Using chalk or pins, mark the necessary alterations directly on the muslin fabric. This could include taking in or letting out seams, adjusting darts, or shortening or lengthening certain areas. Once you’re satisfied with the fit, take apart the muslin mock-up and use it as a guide to adjust your pattern before cutting into your fashion fabric.
Creating a muslin mock-up might seem like an extra step, but it can save you time and frustration in the long run. By perfecting the fit before working with your expensive fabric, you can ensure that your formal wear will look and feel amazing when you wear it.
Sewing Darts and Pleats
Start by marking the placement of your darts and pleats on the fabric.
Darts are used to shape the fabric to fit your body, while pleats add fullness and detail to your garment.
To mark the darts, fold the fabric in half with the right sides together and align the dart legs. Then, using a fabric marker or chalk, make a small mark at the widest part of the dart and at the point where the dart ends.
For pleats, start by determining the width and depth of the pleat. Measure and mark these measurements on the fabric, using a ruler or measuring tape.
To create the pleat, fold the fabric on the marked lines, bringing the folded edges together. Pin or baste the pleats in place, ensuring they’re secure and even.
Once marked, you can now sew the darts and pleats. Remember to backstitch at the beginning and end of each seam to secure it.
Sewing darts and pleats may require some practice, but with time and patience, you’ll master these techniques and create beautifully tailored garments.
Installing Invisible Zippers
Begin by preparing your fabric and zipper for the installation of an invisible zipper. To ensure a smooth and seamless finish, it’s crucial to start with the right materials and measurements.
First, choose a lightweight fabric that matches your garment. Iron it carefully to remove any wrinkles or creases that may interfere with the installation process.
Next, measure the length of the zipper opening on your garment and cut the fabric accordingly, leaving a small seam allowance. Before inserting the zipper, finish the raw edges of the fabric using an overlock stitch or a zigzag stitch. This will prevent fraying and ensure durability.
Now, it’s time to prepare the zipper. Open the zipper fully and press the teeth flat using a hot iron. This step will make it easier to sew the zipper in place. Remember to position the zipper with the right side facing down on the right side of the fabric. Pin it in place to secure it before moving on to the next step.
Hemming Techniques for Formal Wear
Now that you have successfully installed the invisible zipper, let’s focus on mastering hemming techniques for formal wear.
Hemming is an essential step in creating a polished and professional look for your formal garments. Whether it’s a gown, a suit, or a pair of trousers, a well-executed hem won’t only provide a clean finish but also ensure that the garment falls perfectly on your body.
To begin, measure the desired length of your garment and mark it with pins or tailor’s chalk. Remember to consider the type of fabric and the style of the garment when determining the appropriate length.
Next, fold up the excess fabric towards the inside of the garment, aligning it with the marked line. Pin the fold in place, making sure the fabric lies flat and smooth.
Now it’s time to sew the hem. Using a needle and thread that matches your fabric, begin stitching from the inside of the garment. Take small, even stitches along the folded edge, ensuring that the stitches are invisible from the outside. Keep your stitches close together for a secure and neat finish.
Once you have sewn the entire hem, give it a final press with an iron to create a crisp edge. Your formal wear is now ready to be worn with confidence and style.
With practice, you’ll become an expert in hemming techniques, elevating the quality of your formal garments.
Adding Boning for Structure
To achieve a structured and tailored look for your formal wear, consider incorporating boning into your garments. Boning refers to inserting thin, flexible strips of material, such as plastic or steel, into the seams of your clothing. This technique helps provide shape, support, and structure to your garments, particularly in areas like bodices, corsets, and strapless dresses.
To add boning, begin by marking the desired areas where you want to insert the strips. Typically, boning is placed along the seams, such as the side seams, center front, or back. Next, cut the boning to the required length, allowing for a slight overlap at each end. Sew channels or casings into the seams, wide enough to accommodate the boning. When sewing the channels, make sure to leave small openings at each end for inserting and removing the boning.
Once the channels are sewn, insert the boning into the casings, sliding it all the way to the bottom. Be careful not to bend or twist the boning during this process. To secure the boning in place, stitch across the openings on each end of the channels. This will prevent the boning from shifting or coming out.
Finishing Touches: Buttons and Embellishments
To add the perfect finishing touch to your formal wear, consider incorporating buttons and embellishments that will elevate the overall design. Buttons aren’t only functional but can also be decorative elements that add interest and style to your garment. Choose buttons that complement the fabric and design of your formal wear. For a classic and elegant look, opt for buttons made of materials like pearl, crystal, or metal. These buttons can be sewn onto the garment using a matching thread or in a contrasting color to create a statement.
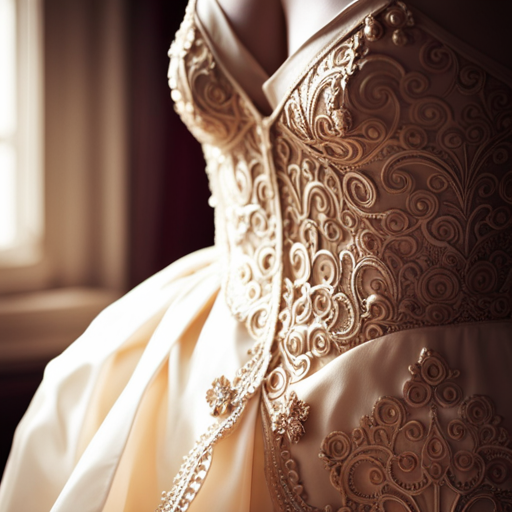
In addition to buttons, embellishments can take your formal wear to the next level. Consider adding lace, beading, or embroidery to enhance the beauty of your garment. Lace can be sewn onto the neckline, cuffs, or hems to create a delicate and romantic touch. Beading can be strategically placed to highlight certain areas of the garment, such as the waistline or bodice. Embroidery can add intricate patterns and designs, giving your formal wear a unique and personalized touch.
When incorporating buttons and embellishments, it’s important to consider the overall design and balance of your garment. Too many buttons or excessive embellishments can overwhelm the look and detract from the elegance of your formal wear. Therefore, it’s crucial to carefully plan and place these elements to achieve a cohesive and polished look.