
Have you ever found yourself frustrated by the challenge of consistently sewing straight lines? It can be a tricky endeavor, but fear not! There are techniques and tricks that can help you achieve perfect straight lines every time.
From choosing the right needle to employing straight line presser feet, this discussion will provide you with valuable insights and practical tips to enhance your sewing skills.
So, if you’re ready to elevate your sewing game and create flawless projects, keep reading to discover the secrets behind sewing straight lines with precision and ease.
Choosing the Right Needle
When sewing, it’s important to choose the right needle for the job to ensure smooth and precise stitches. The needle you select can greatly impact the quality of your sewing project.
To begin, consider the type of fabric you’ll be working with. For lightweight fabrics such as silk or chiffon, opt for a fine needle size, like a size 9 or 11. For medium-weight fabrics such as cotton or linen, a size 12 or 14 needle is ideal. If you’re sewing heavy fabrics like denim or canvas, go for a larger needle size, such as 16 or 18.
Additionally, take into account the type of thread you’ll be using. Thicker threads require larger needle sizes to accommodate them properly.
Furthermore, consider the specific task at hand. Needles with sharp points are suitable for precise sewing, while ballpoint needles are designed for knit fabrics to avoid snags.
Adjusting Tension on Your Sewing Machine
Now that you have chosen the right needle for your sewing project, it’s time to focus on adjusting the tension on your sewing machine. Proper tension is crucial for achieving neat and professional-looking stitches.
When the tension is too loose, your stitches may appear loopy and uneven. On the other hand, if the tension is too tight, your fabric may pucker or the threads may break.
To adjust the tension, locate the tension dial on your sewing machine. Start by setting it to the default or recommended setting. Then, test stitch on a scrap piece of fabric.
If the upper thread is showing on the bottom side, increase the tension slightly. Conversely, if the bobbin thread is showing on the top side, decrease the tension. Make small adjustments and test stitch until you achieve balanced stitches, where the upper and bobbin threads meet in the middle of the fabric.
Remember to also clean and oil your sewing machine regularly, as buildup of lint can affect tension.
With the right needle and properly adjusted tension, you’re on your way to sewing straight lines every time.
Using Seam Guides for Precision
To achieve precise and straight lines in your sewing projects, utilize seam guides for accurate stitching. Seam guides are valuable tools that help you maintain consistent seam allowances and ensure straight lines throughout your sewing projects.
Whether you’re working on garments, quilts, or home decor items, using a seam guide will greatly enhance the overall quality of your finished product.
Seam guides can be found in various forms, such as magnetic guides, adhesive guides, or specialized presser feet with built-in guides. These guides can be attached to your sewing machine’s needle plate or presser foot to act as a reference point for your stitching. By aligning your fabric with the guide, you can easily maintain a straight line and achieve precise seam allowances.
When using a seam guide, it’s important to position it accurately. Take the time to measure and mark your desired seam allowance before attaching the guide. Additionally, ensure that your fabric is aligned with the guide throughout the stitching process. By paying attention to these details, you can achieve professional-looking results with straight, even seams.
Marking Your Fabric for Accuracy
To ensure accurate stitching and maintain straight lines, proper marking of your fabric is essential when using a seam guide. Marking your fabric helps you to identify where your stitches should go and ensures that they’re aligned correctly. There are various methods you can use to mark your fabric accurately.
One simple method is to use a fabric marking pen or pencil. These tools are specifically designed for marking fabric and provide clear, visible lines that can easily be removed or washed away. When using a marking pen or pencil, make sure to test it on a scrap piece of fabric first to ensure that it doesn’t bleed or leave permanent marks.
Another method is to use tailor’s chalk. This type of chalk is easy to apply and can be brushed or washed away once you have finished sewing. It’s especially useful for marking dark or textured fabrics where a fabric marking pen or pencil may not show up as well.
You can also use pins or clips to mark your fabric. Simply place the pins or clips along the stitching line, ensuring they’re evenly spaced and aligned. This method is particularly useful for curved or intricate designs where a straight line may not be applicable.
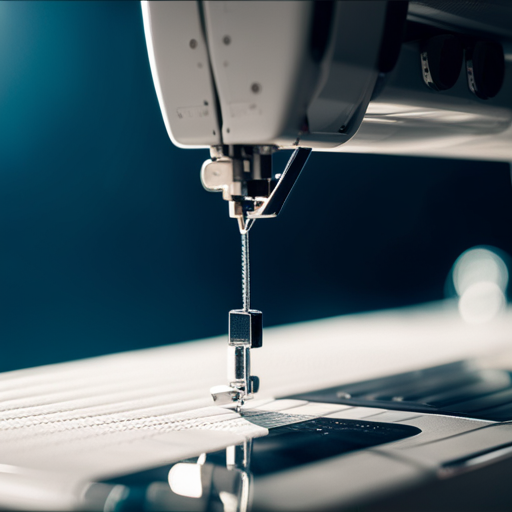
Employing Straight Line Presser Feet
Using a straight line presser foot can greatly assist in sewing straight lines with precision. This specialized foot is designed to guide the fabric and keep it aligned with the sewing machine’s needle, resulting in perfectly straight stitches. By attaching a straight line presser foot to your sewing machine, you can eliminate the need for constant monitoring and adjustment while sewing.
To use a straight line presser foot, start by attaching it to your sewing machine according to the manufacturer’s instructions. Once the foot is securely in place, select the desired stitch length and width on your machine. Place the fabric beneath the presser foot, aligning the edge of the fabric with the edge guide on the foot. As you slowly guide the fabric through the machine, the presser foot will help ensure that the stitches are straight and even.
One advantage of using a straight line presser foot is that it can be used for various sewing projects, such as quilting, garment construction, or home decor. It’s particularly useful when sewing long straight lines, such as hems, seams, or topstitching. By employing this specialized foot, you can achieve professional-looking results with ease.
Maintaining a Consistent Stitch Length
To ensure consistent stitch length, adjust the settings on your sewing machine before beginning your project.
Start by selecting the appropriate stitch length on your machine. This can usually be done by turning a dial or pressing a button labeled ‘stitch length.’ A shorter stitch length, such as 2.5mm, is ideal for lightweight fabrics, while a longer stitch length, around 3.5mm, works well for heavier fabrics.
Once you have set the stitch length, make sure the machine’s tension is properly adjusted. Improper tension can cause uneven stitch length, so it’s important to check and adjust it accordingly. You can do this by referring to your machine’s manual or consulting an expert if needed.
Additionally, it’s crucial to maintain a steady sewing speed. Sewing too fast or too slow can lead to inconsistent stitch length. Practice sewing at a comfortable and consistent pace to achieve the desired results.
Practicing Proper Sewing Techniques
Now that you have mastered adjusting your machine’s settings for consistent stitch length, let’s focus on practicing proper sewing techniques. These techniques won’t only help you sew straight lines but also improve your overall sewing skills.
Firstly, it’s important to maintain a steady hand and a relaxed grip on the fabric. Tension in your hand can affect the straightness of your stitches. Keep your fingers light and guide the fabric smoothly under the needle.
Secondly, make sure you’re using the correct foot for the type of fabric you’re sewing. A standard presser foot works well for most fabrics, but for thicker fabrics or multiple layers, a walking foot or a zipper foot might be more suitable. Using the right foot will ensure even feeding of the fabric and prevent it from shifting.
Next, take your time and sew slowly. Rushing can lead to uneven stitches and crooked lines. By sewing at a slower pace, you can maintain better control and accuracy.
Lastly, practice, practice, practice! The more you sew, the more comfortable you’ll become with sewing straight lines. Start with simple projects and gradually challenge yourself with more complex designs.
Finishing Touches for Professional Results
For professional results, pay attention to the finishing touches. These final details can make all the difference in giving your sewing projects a polished and professional look.
One important finishing touch is pressing your seams. Take the time to press each seam as you sew, using an iron set to the appropriate temperature for your fabric. This will help flatten the seams and give your project a neat and crisp appearance.
Another finishing touch is to trim any excess threads. These loose threads can detract from the overall look of your project, so make sure to trim them close to the fabric.
Additionally, consider adding topstitching to your projects. Topstitching not only adds a decorative element, but it also helps to secure seams and give your project a more finished look.
Finally, don’t forget to give your project a final press after it’s complete. This will help to set the stitches and ensure that your project looks its best.