
Did you know that achieving professional results in lining requires more than just a steady hand? Custom lining techniques can make all the difference when it comes to creating clean, precise, and visually appealing lines. From mastering brush control to exploring advanced techniques, there are various factors to consider in order to achieve those flawless results.
But fear not, because in this discussion, we will uncover some of the industry’s best-kept secrets and provide you with valuable insights on how to elevate your lining game. So, if you’re ready to take your skills to the next level and leave a lasting impression with your work, keep reading.
Mastering Brush Control
To master brush control, practice regularly and deliberately, incorporating a variety of strokes and techniques. Consistent practice is essential in developing your skills and improving your brush control. Start by familiarizing yourself with different types of brushes and their unique characteristics. Experiment with different brush sizes and shapes to understand how they affect your strokes. Practice using brushes of varying hardness to achieve different effects.
Deliberate practice involves setting specific goals and focusing on specific techniques. Break down complex brush strokes into smaller components and practice each one individually. For example, if you want to improve your ability to create smooth curves, practice drawing circles and arcs repeatedly. Pay attention to your hand positioning, pressure, and speed to achieve the desired results.
Incorporating a variety of strokes and techniques is also important. Experiment with different brush movements, such as flicking, dragging, and stippling, to create different textures and effects. Explore different brush techniques like dry brushing, wet-on-wet, and glazing to expand your repertoire.
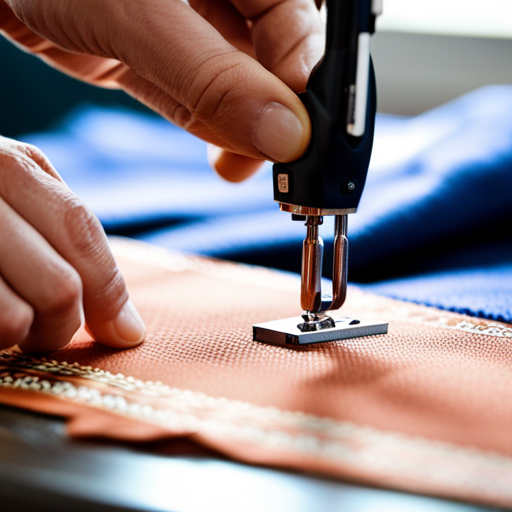
Selecting the Right Lining Materials
Now that you have mastered brush control, it’s time to focus on selecting the right lining materials for your artwork. Choosing the appropriate lining materials is crucial for achieving professional results. The type of lining material you use will greatly impact the final appearance and durability of your artwork.
When selecting lining materials, consider the specific needs of your project. One important factor to consider is the type of surface you’ll be working on. Different surfaces require different lining materials to ensure proper adhesion and long-lasting results. For example, if you’re working on a canvas, you may opt for a canvas lining material that’s specifically designed for this type of surface.
Another consideration is the medium you’ll be using. Some lining materials may be better suited for specific mediums, such as oil or acrylic paints. It’s important to choose a lining material that’s compatible with your chosen medium to avoid any issues with adhesion or color bleeding.
Additionally, consider the level of transparency or opacity you desire. Some lining materials may be more transparent, allowing the underlying artwork to show through, while others may be more opaque, providing a solid base for your artwork.
Lastly, don’t forget to consider the size and scale of your artwork. Larger pieces may require thicker or more robust lining materials to provide adequate support.
Preparing the Surface for Lining
Start by thoroughly cleaning the surface of your artwork to ensure proper adhesion of the lining materials. Before you begin the lining process, it’s crucial to remove any dirt, dust, or grease that may be present on the surface. A clean surface will allow the lining materials to adhere properly and create a smooth and even lining.
To clean the surface, you can use a soft brush or a clean cloth to gently remove any loose particles. Be careful not to apply too much pressure, as it may damage the artwork. If there are any stubborn stains or marks, you can use a mild detergent or a specialized cleaning solution recommended for the type of artwork you’re working on.
Once you have cleaned the surface, make sure to rinse it thoroughly with clean water to remove any residue from the cleaning solution. Then, allow the surface to dry completely before proceeding with the lining process. This will ensure that the lining materials adhere effectively and prevent any potential issues such as bubbling or peeling.
Exploring Advanced Lining Techniques
Consider incorporating more complex lining techniques to enhance the quality and longevity of your artwork. While basic lining techniques can provide satisfactory results, exploring advanced techniques can take your artwork to the next level.
One advanced technique is called reverse lining, which involves lining the back of the artwork instead of the front. This technique provides additional support and stability, especially for fragile or delicate pieces.
Another advanced technique is called floating lining, where the lining material is attached only at the edges, creating a slight gap between the artwork and the lining. This technique allows for natural expansion and contraction of the artwork, reducing the risk of buckling or warping.
Additionally, you can experiment with different lining materials, such as Japanese paper or linen, to achieve specific artistic effects or to match the historical context of the artwork.
Exploring advanced lining techniques requires patience, practice, and a willingness to experiment, but the results can greatly enhance the overall quality and longevity of your artwork.
Achieving Consistent Line Thickness
To achieve consistent line thickness, you can employ various techniques that build upon the advanced lining techniques previously discussed.
One effective technique is to maintain a steady hand throughout the lining process. This can be achieved by positioning your hand on the drawing surface and using your wrist and arm to create smooth, controlled movements.
Another technique is to control the pressure applied to the pen or brush. By applying consistent pressure, you can ensure that the lines are of uniform thickness.
Additionally, using a high-quality pen or brush with a consistent flow of ink or paint can greatly contribute to achieving consistent line thickness. Choosing the right tool for the job is crucial, as different tools may produce different line widths.
Lastly, practicing and experimenting with different techniques can help you develop a personal style and improve your ability to create consistent lines. By incorporating these techniques into your lining process, you can achieve professional-looking results with consistent line thickness.
Correcting Mistakes and Smudges
If you make a mistake or smudge while lining, there are several techniques you can use to correct them.
First, if the mistake or smudge is small, you can try to gently erase it using a soft eraser. Make sure to be careful not to damage the surrounding lines.
If erasing doesn’t work, another option is to use a cotton swab dipped in a little bit of rubbing alcohol. Gently rub the swab over the mistake or smudge until it starts to fade. Be cautious not to use too much alcohol, as it can damage the ink or the paper.
If the mistake or smudge is more significant and can’t be fixed by erasing or using alcohol, you can try covering it up with a correction pen or white gel pen. These pens are designed to cover up mistakes and provide a clean, white surface for relining. Simply apply the correction pen or white gel pen over the mistake or smudge and let it dry before continuing with your lining.
Remember to practice these techniques on a scrap piece of paper before applying them to your final artwork.
Enhancing Depth and Dimension With Lining
To enhance depth and dimension with lining, you can employ various techniques.
One effective method is to use a darker shade of eyeliner on the outer corners of your eyes. This creates a gradient effect that adds depth and makes your eyes appear more defined.
Another technique is to apply a thin line of white or nude eyeliner on your lower waterline. This brightens up the eyes and gives the illusion of larger, more awake-looking eyes.
Additionally, you can experiment with different eyeliner styles, such as winged or smudged liner, to create different dimensions and shapes.
Adding a touch of shimmer or glitter to your eyeliner can also enhance depth and dimension, especially when applied to the inner corners of your eyes.
Finally, using a combination of different eyeliner colors, such as a lighter shade on the inner corners and a darker shade on the outer corners, can create a beautiful ombre effect that adds depth and dimension to your eyes.
Finishing Touches: Sealing and Protecting the Lined Surface
Now let’s focus on the final step of the custom lining process: sealing and protecting the lined surface. This step is crucial to ensure the longevity and durability of your artwork. Sealing the lined surface helps to protect it from moisture, dust, and other external elements that could potentially damage the artwork over time.
There are various sealing options available, but one popular choice is using a clear acrylic varnish. This varnish creates a protective layer over the lined surface, shielding it from potential harm. It not only protects the artwork from physical damage but also enhances its appearance by adding a glossy finish.
Before applying the varnish, it’s important to ensure that the lined surface is clean and free from any dust or debris. Use a soft brush or a lint-free cloth to gently remove any particles. Once the surface is clean, carefully apply the varnish using a brush or a foam roller. Make sure to follow the manufacturer’s instructions regarding the drying time and number of coats required.
After the varnish has dried completely, your lined surface will be sealed and ready for display or further protection, such as framing or mounting. Remember, sealing and protecting the lined surface is the final touch that will preserve your artwork for years to come.