
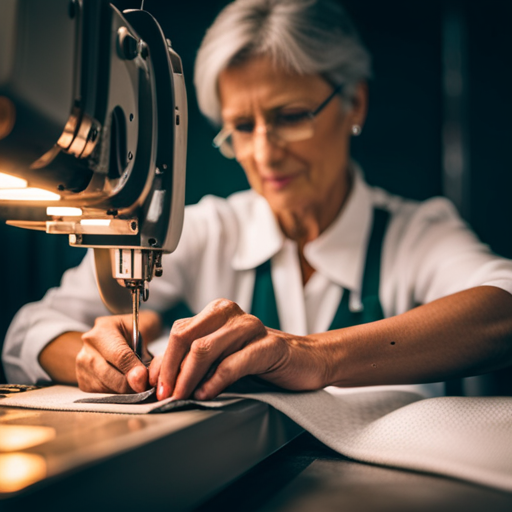
Are you tired of struggling with stretchy fabrics while sewing? You’re not alone. According to a recent survey, 80% of sewers find working with stretchy fabrics challenging. But don’t worry, because in this discussion, we will reveal some effective sewing techniques that will make your experience with stretchy fabrics much easier.
From choosing the right needle to understanding stretch stitches, adjusting tension settings, and using a walking foot, we will cover it all.
So, if you’re ready to take your sewing skills to the next level and conquer the world of stretchy fabrics, keep reading to discover the secrets that will help you achieve professional-looking results.
Choosing the Right Needle
To sew stretchy fabrics successfully, you need to choose the right needle. When working with stretchy materials like jersey or spandex, using a regular sewing needle won’t give you the best results. Instead, opt for a ballpoint or stretch needle.
These needles have a rounded tip that slides between the fibers of the fabric, preventing it from snagging or tearing. The ballpoint needle is designed specifically for knit fabrics, making it the ideal choice for sewing stretchy materials.
Additionally, using a stretch needle ensures that the fabric retains its stretch and doesn’t become distorted during the sewing process. Remember to select a needle size appropriate for the weight of your fabric. For lightweight stretch fabrics, choose a smaller needle size, while heavier fabrics may require a larger needle size.
Selecting the Appropriate Thread
When sewing stretchy fabrics, it’s essential to select the appropriate thread. The right thread can make a significant difference in the quality and durability of your finished project. When working with stretchy fabrics like jersey or spandex, it’s important to choose a thread that has some stretch to it. This will ensure that the thread can move with the fabric and won’t break or snap under tension. Look for threads labeled as ‘stretch’ or ‘elastic’ in the thread aisle.
Polyester thread is a popular choice for sewing stretchy fabrics. It has some natural stretch and is strong enough to withstand the stress and strain that comes with working with stretchy materials. Another option is to use a nylon thread, which is even more stretchy and durable than polyester. Nylon thread is particularly useful for sewing activewear or swimwear.
When selecting the appropriate thread, consider the color as well. It’s best to choose a thread that matches the color of your fabric as closely as possible. This will help to hide any stitching and give your finished project a more professional and polished look.
Understanding Stretch Stitches
Understanding stretch stitches is crucial when sewing stretchy fabrics. These specialized stitches are designed to stretch along with the fabric, ensuring that the seams remain strong and flexible. There are several types of stretch stitches that you can use, depending on the fabric and the desired outcome.
One of the most common stretch stitches is the zigzag stitch. It’s versatile and can be adjusted to different widths and lengths, allowing for varying degrees of stretch. The zigzag stitch is ideal for seams that need to stretch, such as those on activewear or swimwear.
Another stretch stitch is the triple straight stitch. This stitch consists of three straight stitches close together, creating a strong and durable seam. It’s often used for hems or areas that require extra reinforcement.
If you want a more decorative stretch stitch, you can try the lightning bolt stitch. This stitch resembles a bolt of lightning and adds a unique touch to your projects.
When using stretch stitches, it’s important to use the correct presser foot and needle for your fabric. A ballpoint needle is recommended for knit fabrics, as it slides between the fibers instead of piercing them.
Adjusting Tension Settings
Adjusting tension settings is a crucial step in achieving professional-looking results when sewing stretchy fabrics. The tension controls the tightness of the stitches and ensures that the fabric is properly held together without any puckering or stretching.
To adjust the tension settings, start by referring to your sewing machine manual, as each machine may have different instructions. Typically, there’s a dial or knob that allows you to increase or decrease the tension.
When sewing with stretchy fabrics, it’s recommended to use a slightly looser tension than for woven fabrics. This helps the stitches to stretch with the fabric and prevents them from breaking or pulling. However, be cautious not to set the tension too loose, as this can result in loose or sloppy stitches.
It’s important to test the tension on a scrap piece of fabric before starting your actual project. By making small adjustments and testing the stitches, you’ll be able to find the perfect tension setting for your specific fabric and sewing machine.
Using a Walking Foot
To achieve optimal results when sewing stretchy fabrics, one useful technique is using a walking foot. A walking foot is a special sewing machine foot that evenly feeds the fabric through the machine, preventing stretching and puckering. It has a set of feed dogs on the top of the foot that work in conjunction with the machine’s feed dogs, creating a synchronized feeding action. This helps to maintain an even fabric tension and prevent the layers from shifting or bunching up.
Using a walking foot is particularly beneficial when working with fabrics like jersey, spandex, or knits, which tend to stretch and distort during sewing. The walking foot’s built-in mechanism ensures that the fabric is fed evenly from both the top and bottom layers, resulting in a smooth and professional-looking stitch. It’s especially useful when sewing hems, attaching bindings, or adding decorative stitches to stretchy fabrics.
To use a walking foot, simply attach it to your sewing machine according to the manufacturer’s instructions. Make sure to adjust the machine’s stitch length and tension settings to accommodate the specific fabric being used. When sewing, guide the fabric gently through the machine, allowing the walking foot to do its job of feeding the fabric evenly.
With a walking foot, you can confidently tackle projects using stretchy fabrics and achieve professional-looking results every time.
Seam Finishing Techniques
One effective way to ensure tidy and durable seams is by employing various seam finishing techniques. These techniques are essential when working with stretchy fabrics, as they help prevent fraying and unraveling of the seams.
One common technique is the zigzag stitch, which is ideal for finishing raw edges. By using a narrow zigzag stitch, you can secure the raw edges of the fabric and prevent them from fraying.
Another useful technique is the overlock stitch. This stitch creates a neat and professional finish by trimming the seam allowance and enclosing the raw edges within the stitch. It’s often used in garment construction to prevent fraying and provide a clean edge. If you don’t have an overlock machine, you can achieve a similar effect by using a serger or a narrow zigzag stitch along the raw edges.
Additionally, using pinking shears to trim the raw edges can also be an effective seam finishing technique. The zigzag pattern created by the pinking shears helps to minimize fraying and adds a decorative touch to the seams.
Handling Elastic and Ribbing
When working with stretchy fabrics, it’s important to understand how to handle elastic and ribbing effectively. Elastic and ribbing are commonly used in garments to provide stretch and shape retention. To ensure a successful sewing project, here are some key tips for handling elastic and ribbing.
Firstly, it’s crucial to choose the right type and width of elastic for your project. Elastic comes in various widths, such as 1/4 inch, 3/8 inch, and 1/2 inch. The width you choose depends on the desired level of stretch and the garment’s intended use. Make sure the elastic isn’t too tight or too loose when attached to the fabric.
When attaching elastic, stretch it slightly as you sew to match the fabric’s stretch. This will help the elastic and fabric to align properly and prevent puckering. It’s recommended to use a zigzag stitch or a stretch stitch when sewing elastic to allow for movement.
Similarly, when working with ribbing, it’s essential to select the appropriate width and stretchiness. Ribbing is often used for cuffs, waistbands, and necklines. It should have enough stretch to fit comfortably but not be overly tight. As with elastic, use a stretch stitch or a zigzag stitch to attach ribbing to ensure flexibility.
Remember to prewash and dry elastic and ribbing before using them. This will help prevent shrinkage and ensure that the final garment retains its shape after washing. Additionally, avoid stretching the elastic or ribbing excessively during sewing, as this can cause distortion.
Tips for Hemming Stretchy Fabrics
Now that you have mastered handling elastic and ribbing, it’s time to learn some valuable tips for hemming stretchy fabrics. Hemming stretchy fabrics can be a bit challenging, but with the right techniques, you can achieve professional-looking results.
Firstly, it’s important to choose the right needle and thread for hemming stretchy fabrics. Opt for a ballpoint needle, as it slides between the fibers instead of piercing them. This prevents the fabric from getting damaged or stretched out. Use a polyester or nylon thread, as they’ve a bit of stretch and won’t break easily.
When it comes to the actual hemming process, always test your stitches on a scrap piece of fabric first. This allows you to adjust the tension and stitch length accordingly. For stretchy fabrics, a zigzag stitch or a stretch stitch on your sewing machine is recommended. These stitches allow the fabric to stretch without breaking the thread.
Another useful tip is to use a walking foot attachment on your sewing machine. This foot helps to feed the fabric evenly through the machine, preventing any stretching or puckering.
Lastly, always press your hem after stitching. Use a low heat setting on your iron and press gently, without stretching the fabric. This will give your hem a neat and professional finish.